Since launching Bessie Bakes Backdrops in 2019, I have received so many questions about how to stand up backdrops so that they can be used as the fake wall behind your scene. This is a great question, and the good news is I have 3 easy ways that you can hang our lightweight physical, super-thin and pliable backdrops, as well as large portrait backdrops too!
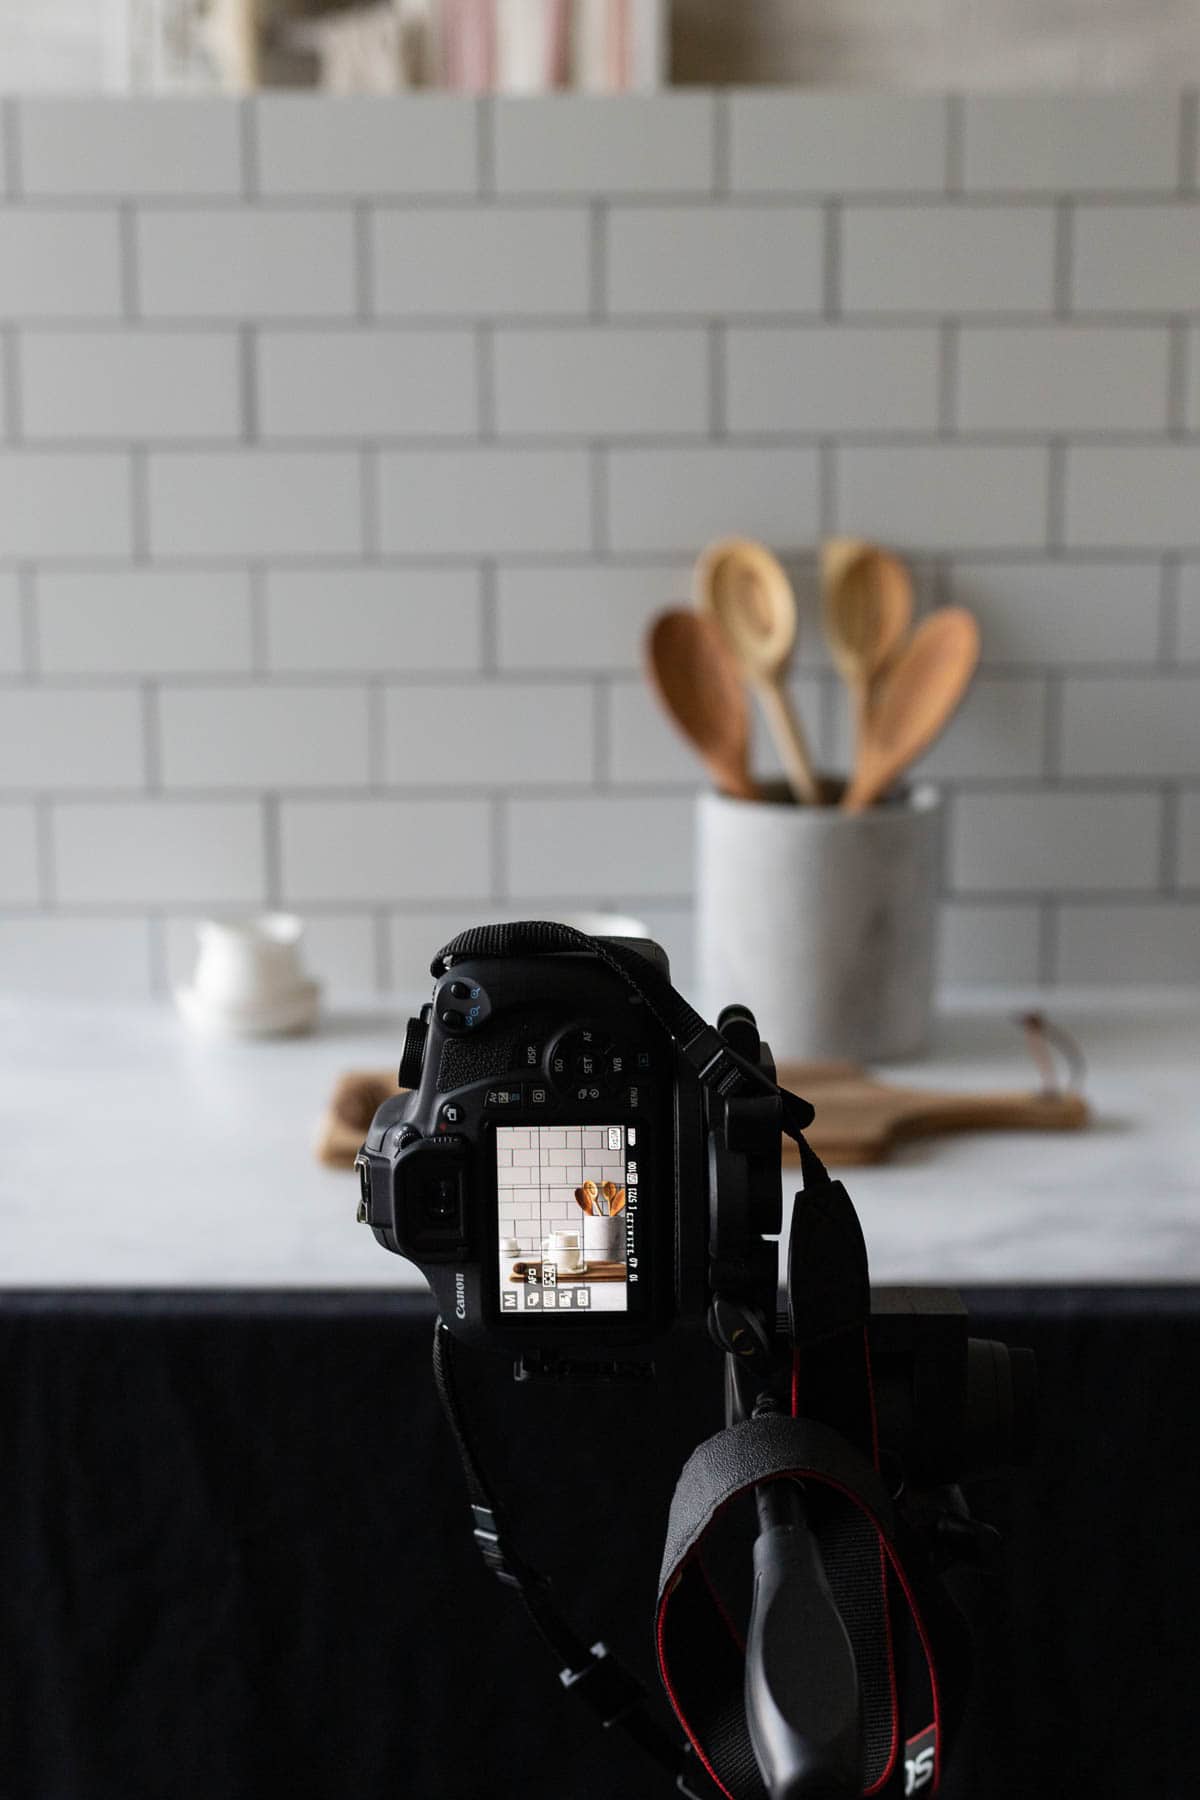
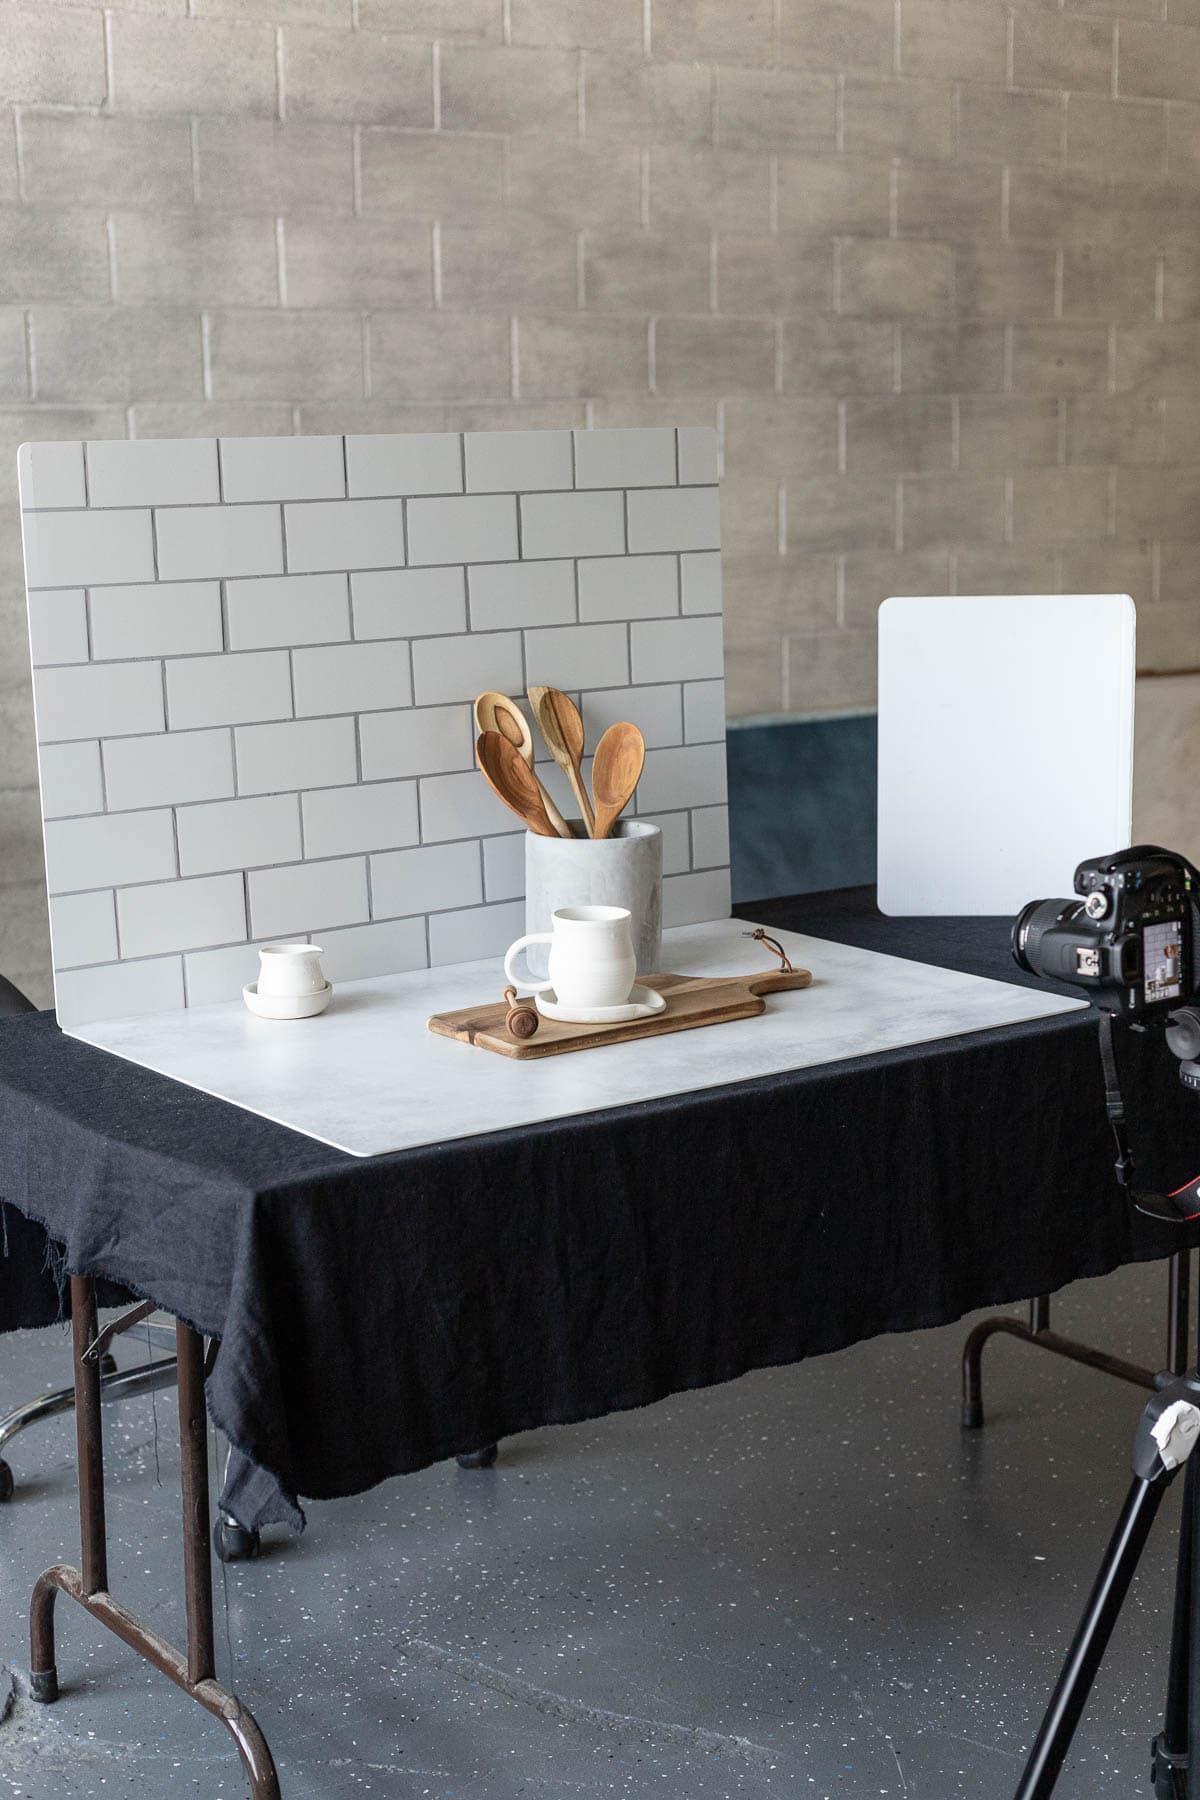
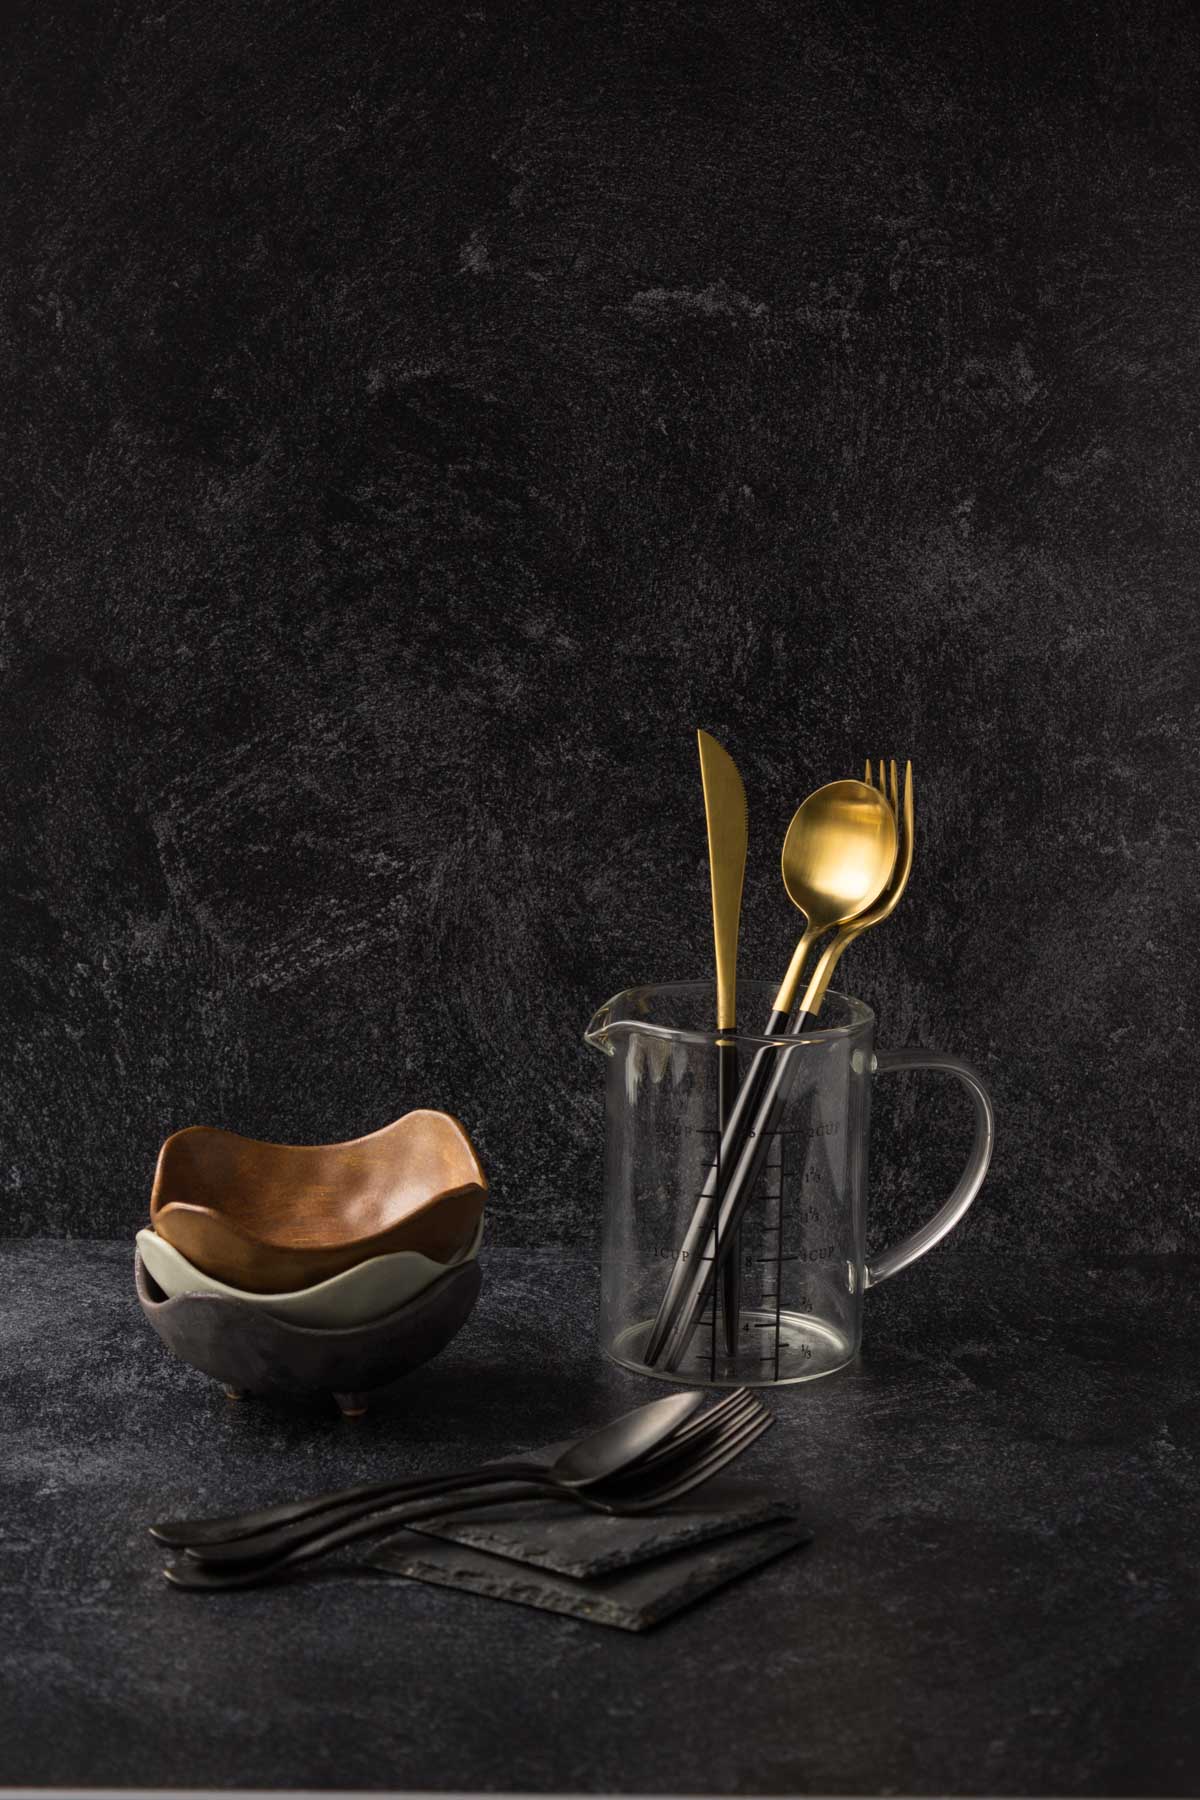
Pictured below is the Most Realistic Subway Tile (it’s not real tile!) and the Cloudy Gray backdrops. Check out our Amazon store for all of our products.
We have two sizes of food and product photography backdrops that are 2 feet x 3 feet and 20-inch x 20-inch. We carry two materials, lightweight physical material and a super-thin and pliable style that can be propped up in a couple of different ways.
Do you sell your own backdrop stands?
Although we get lots of requests to create our own stands, we haven’t created any because our 2 ft x 3 ft backdrops are quite large. Smaller plastic stands that you slide your backdrops into are generally best for smaller backdrops.
The last thing we want is to create small plastic stands, only to have issues with the backdrops not being stable or crashing onto your scene.
An easy and free option
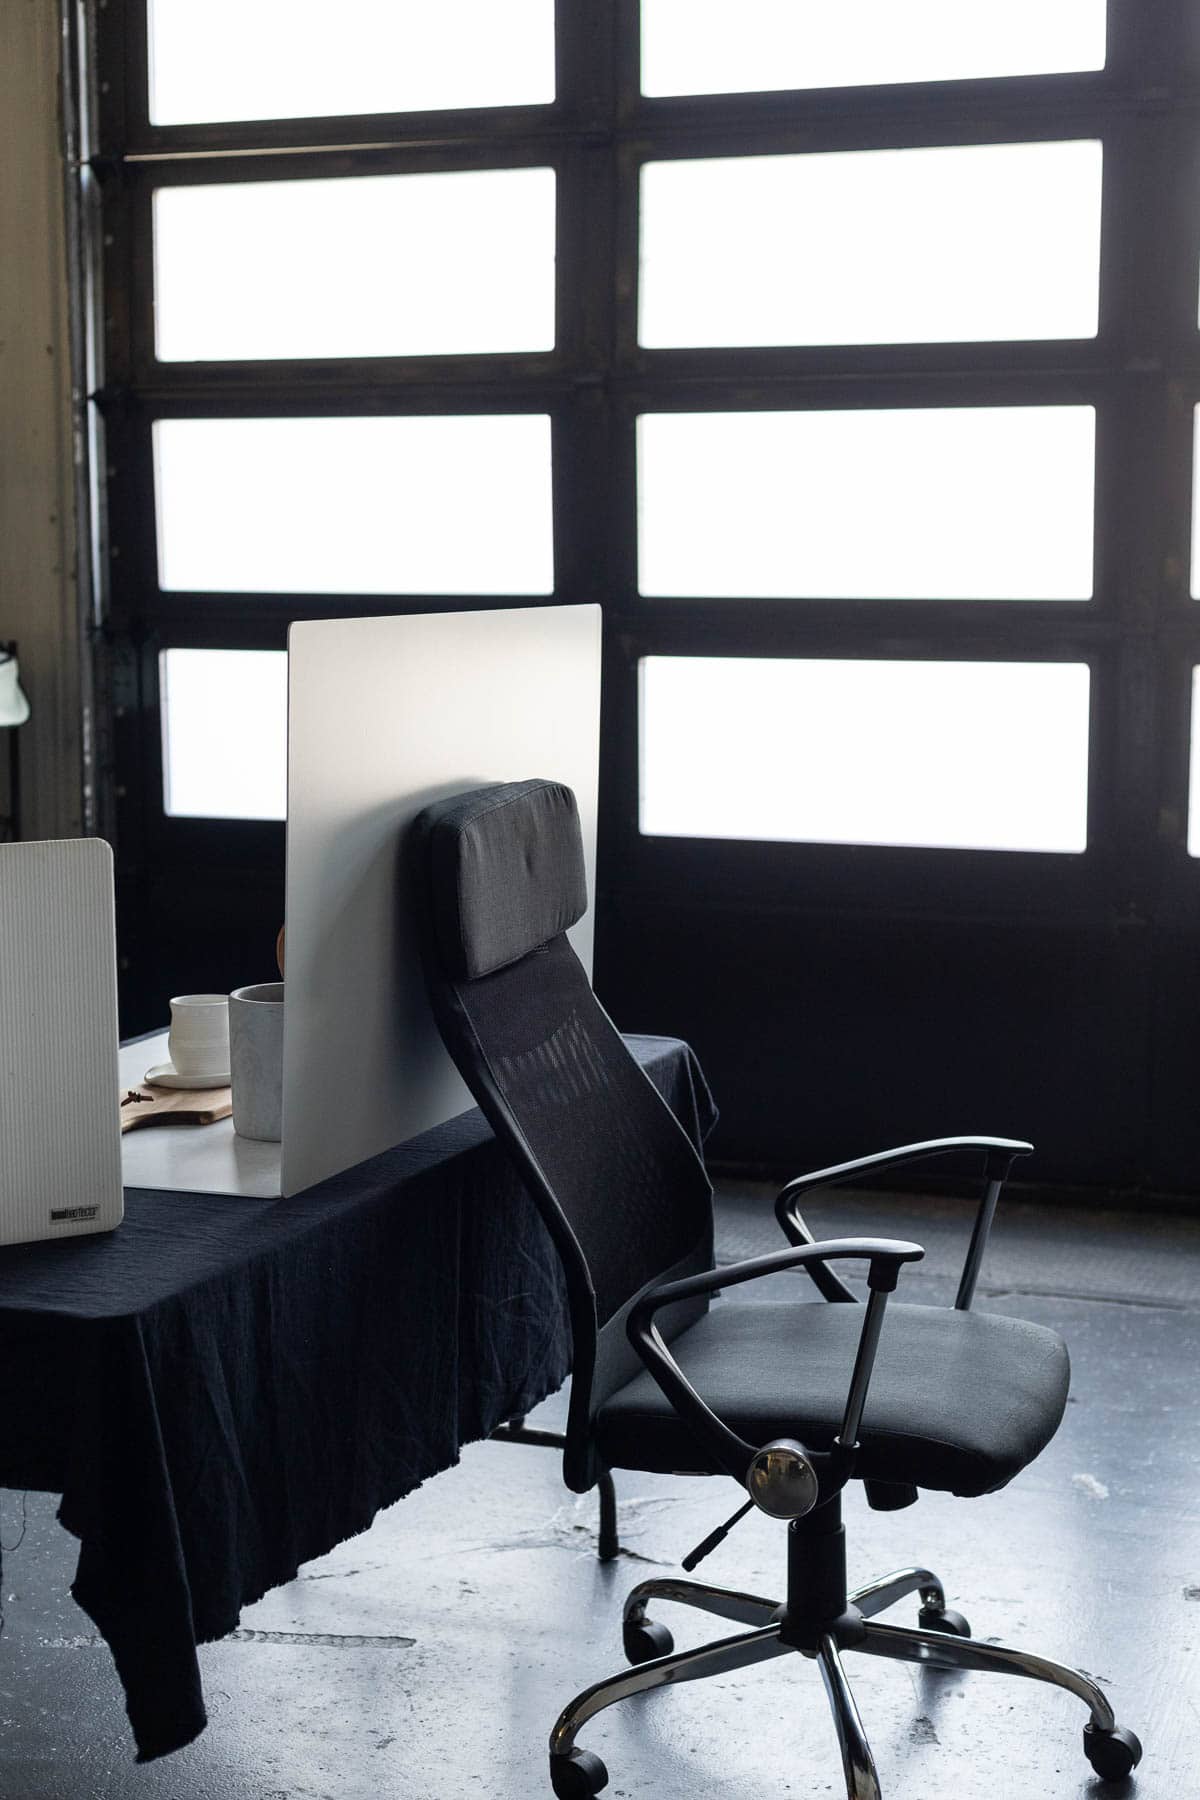
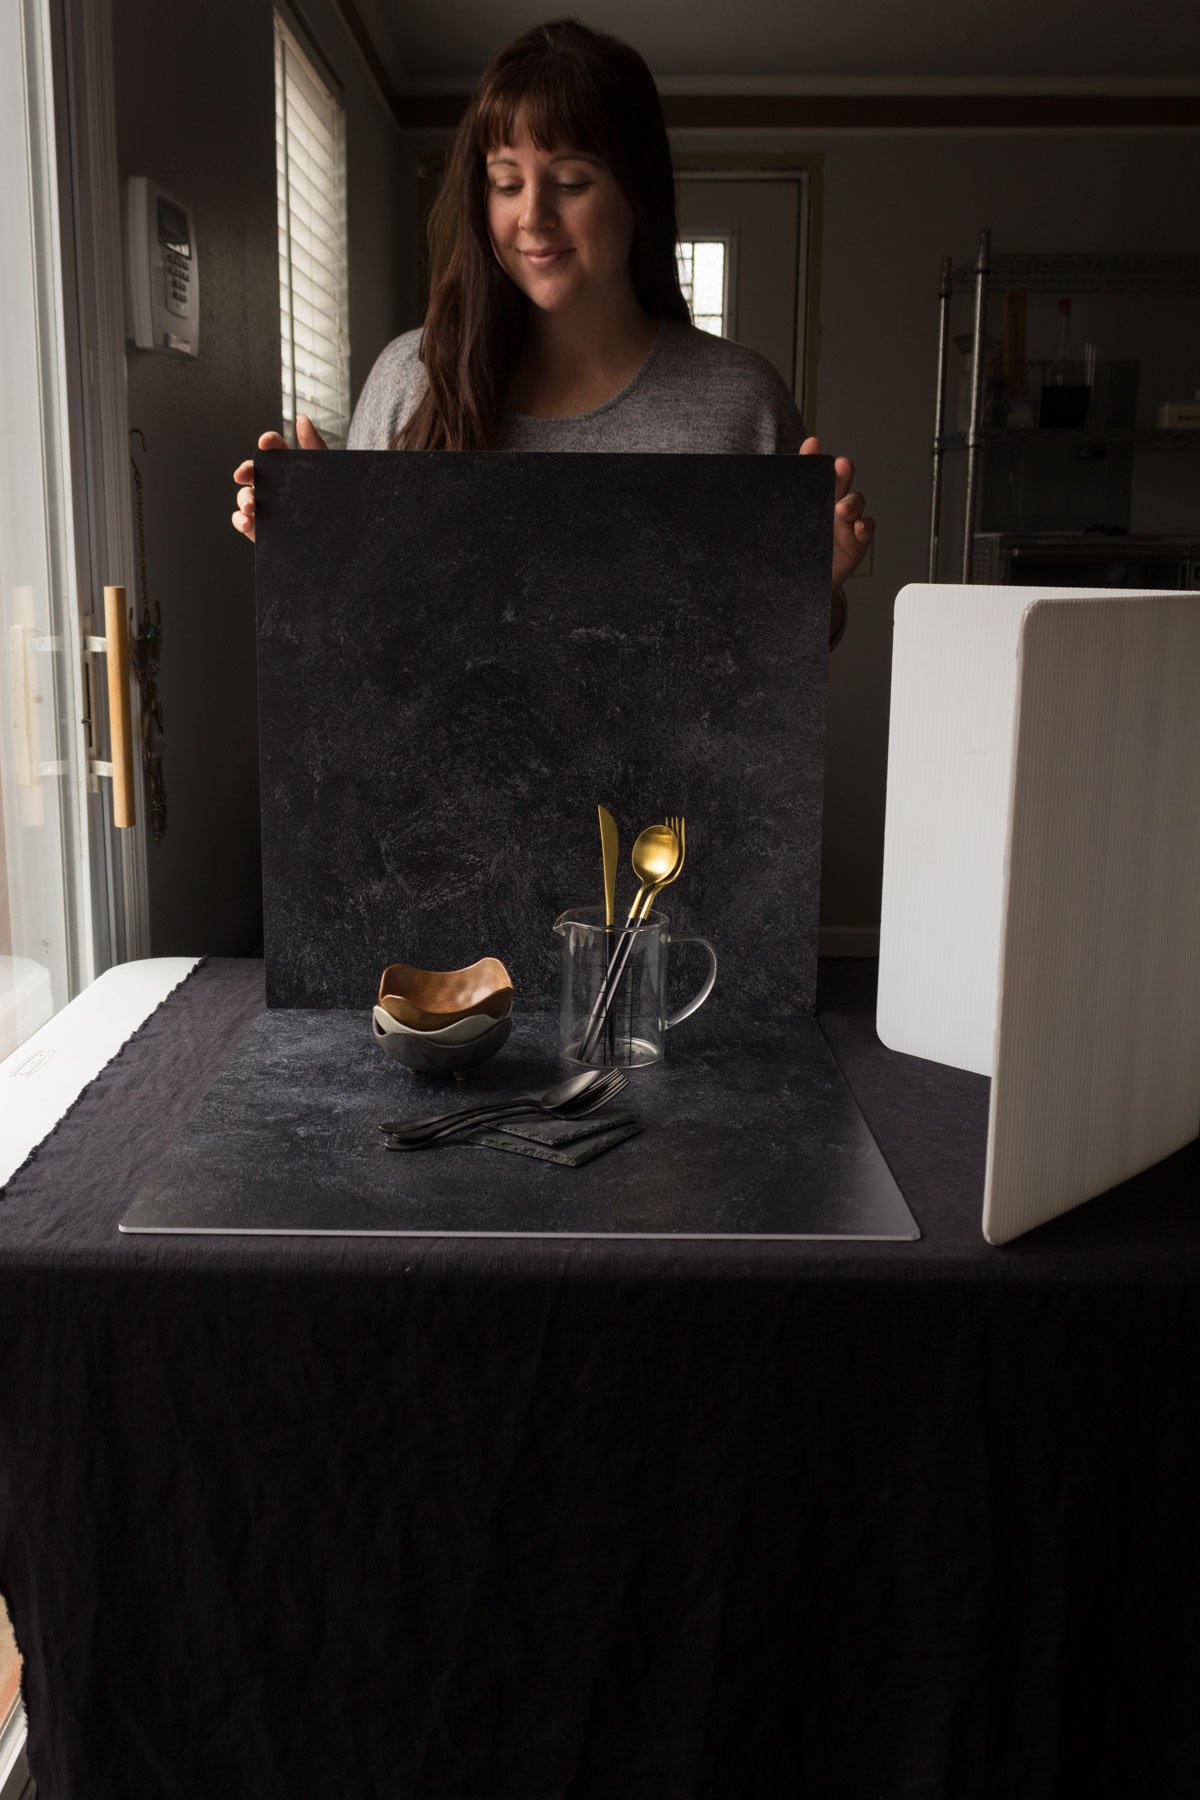
Prop it up with an office chair! For the longest time I just used a high-back office chair because it’s the easiest and fastest way to prop up one of our backdrops. Our lightweight physical backdrops are 1/8-inch thick which makes them thick enough to stand up on their own as long as something is holding them up.
Other types of backdrops, like wooden boards or painted ones made out of plywood, are likely too heavy to stand up this way, so be careful using this method with heavier materials.
I prefer to use a chair with a high back because it needs to have enough height in order to hold up the backdrop that will likely be placed on a table. If your backdrop is standing up on the floor you can use whatever chair you have.
Option 2
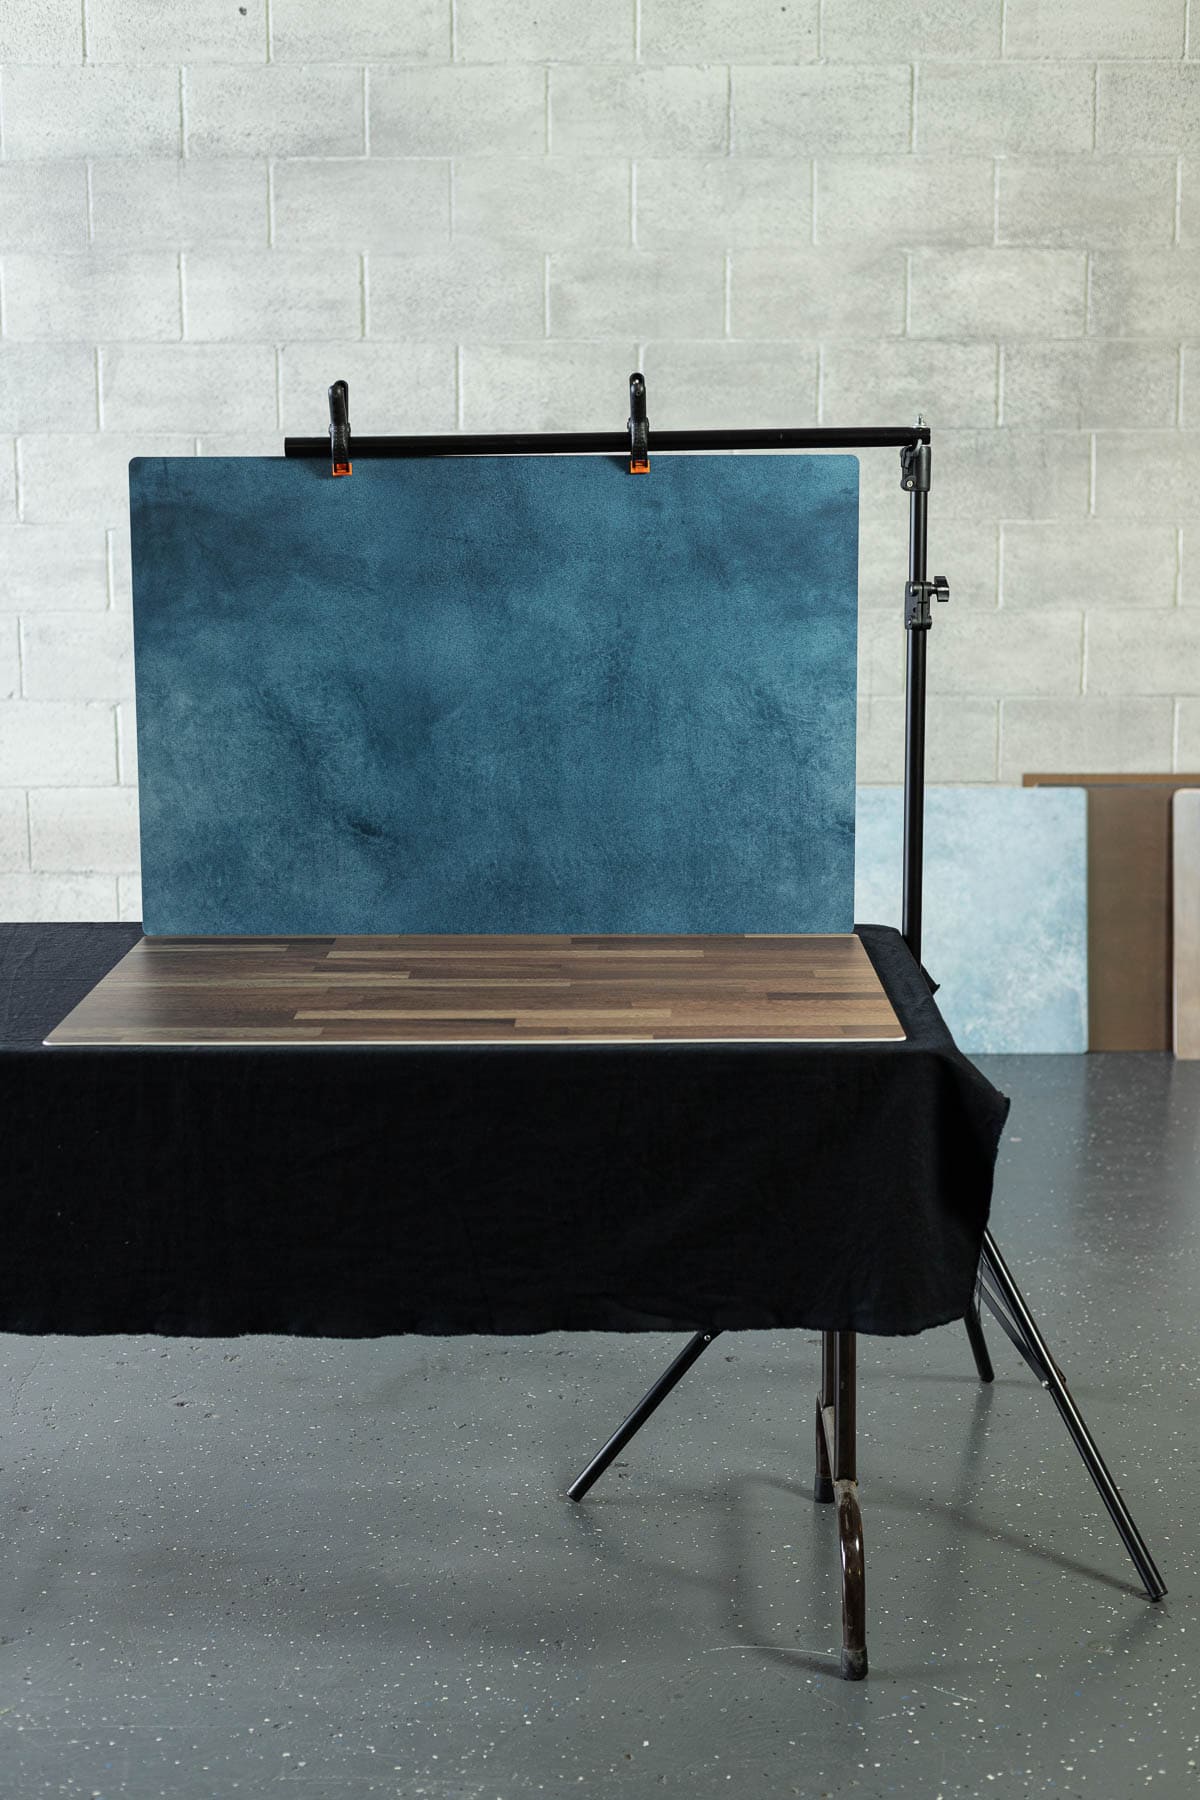
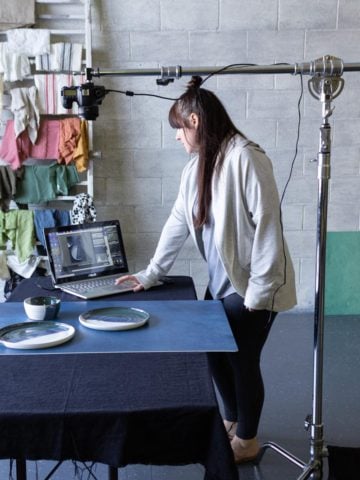
If you prefer a method that is more stable, then lightweight photography stands are your best option. I resisted using them for the longest time because I didn’t want to mess with too many large pieces of equipment.
But after using them only once I found that they actually take up the same amount of space as the chair because you can detach the stand pieces and fold up the side you aren’t using and it can be stored in a small space.
There are many brands of photo stands out there, but this stand is a great option because it’s really affordable, comes with photography clips, sandbags and a carrying case so you can take it on the go.
You can see from the photo below how little space this photography stand takes up when it’s split in half. It slides right up next to the table as well. This is great if you have a limited amount of space to take your photos in.
The added benefit of photography stands is that you can use them to hang large fabric or paper backdrops for portraits or clamp on reflectors or diffusers to them if you need to bounce or diffuse light onto your scene.
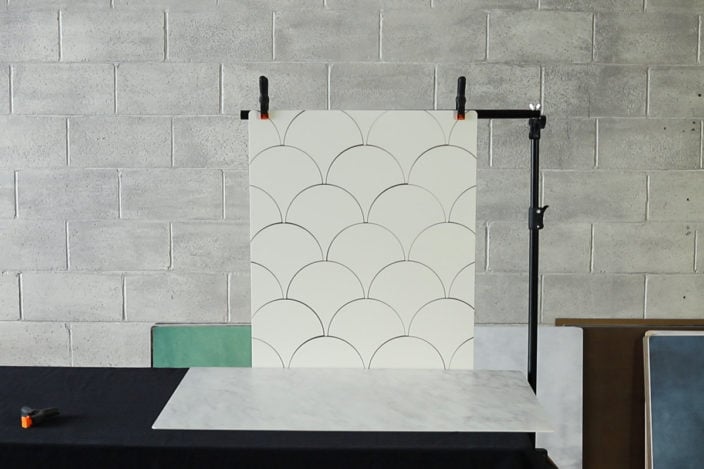
How to prop up thin and pliable material backdrops (two ways)
If you want to stand up a flexible material type backdrop there are two ways you can hang them. Which way you do this depends on which orientation you want them to be standing up in.
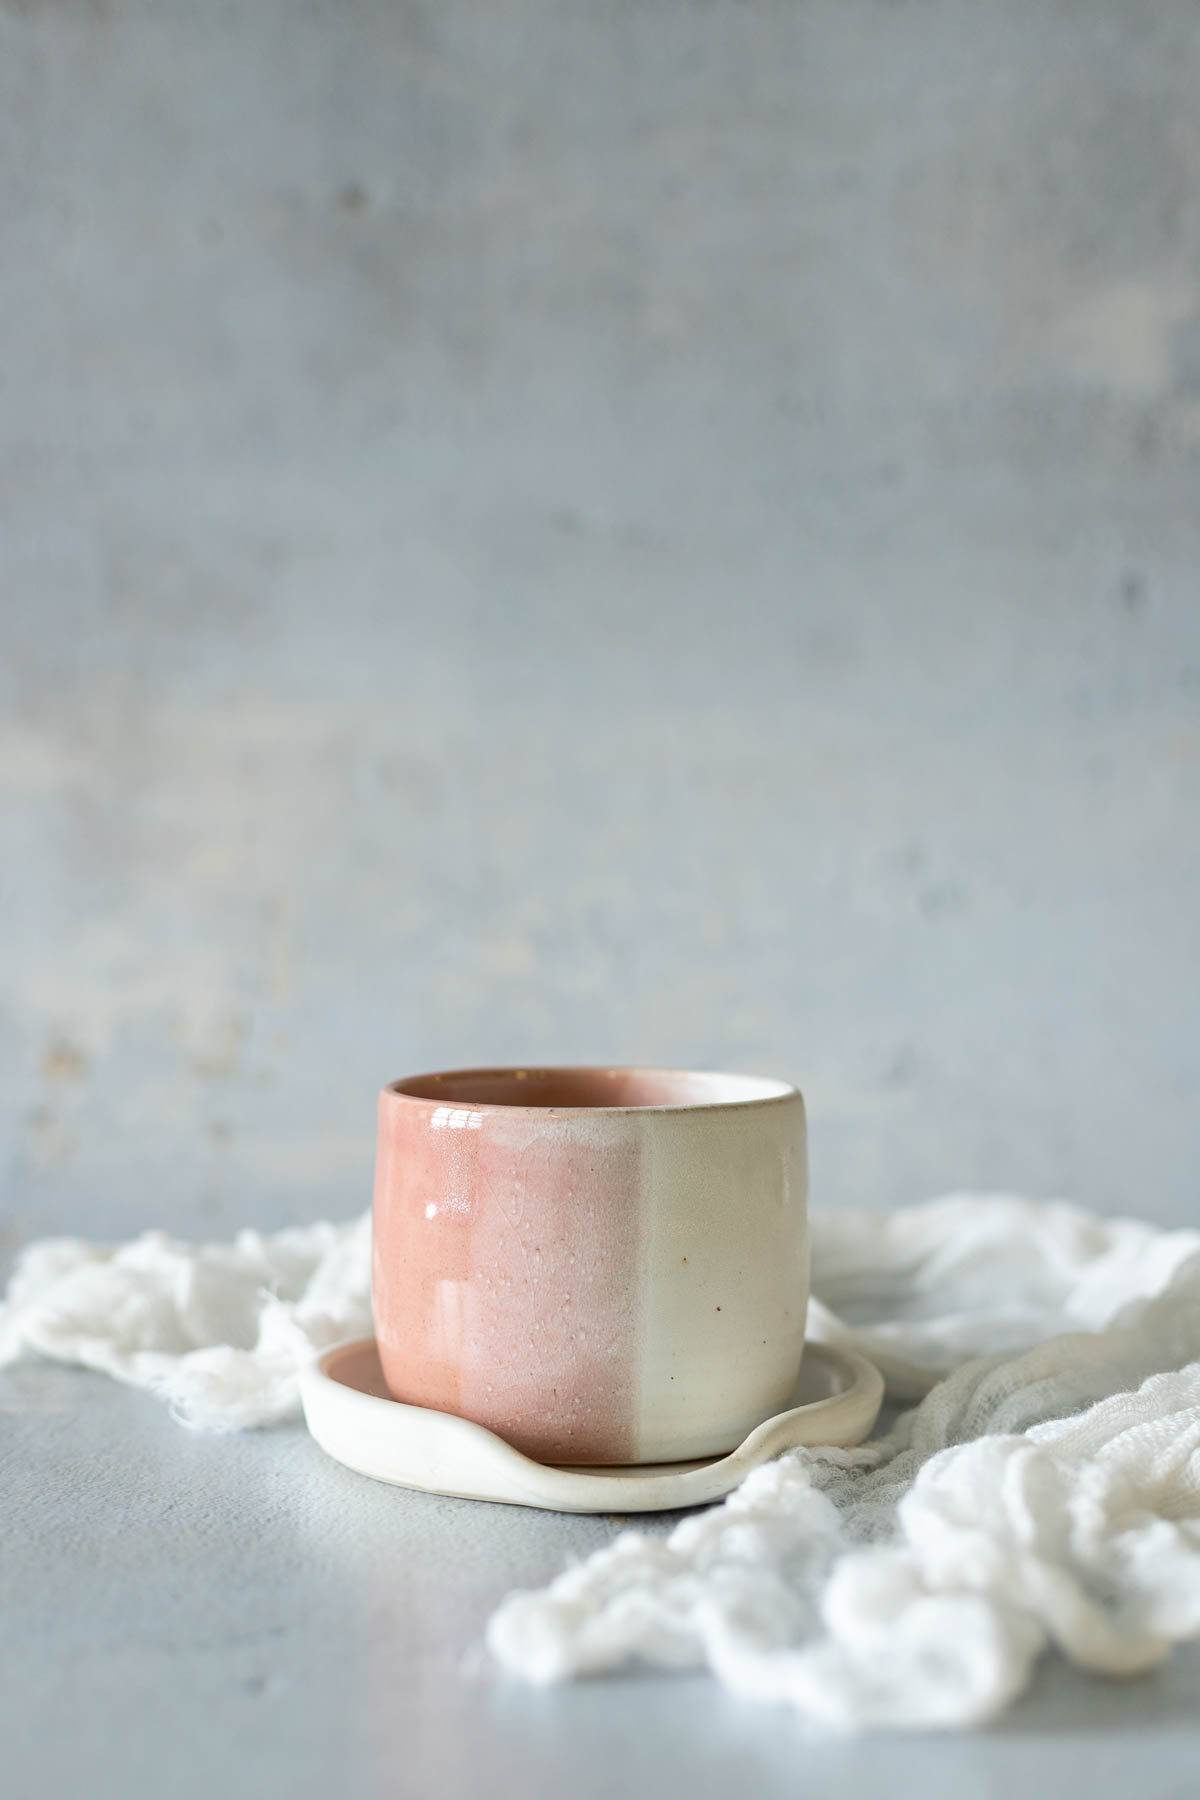
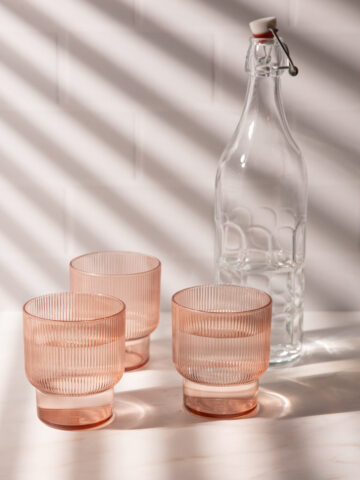
The first option is if you want to use only one pliable backdrop and use it as an “infinity” surface, meaning that’s it’s one seamless surface and wall in the frame. The photo above with the pink cup is an example of this.
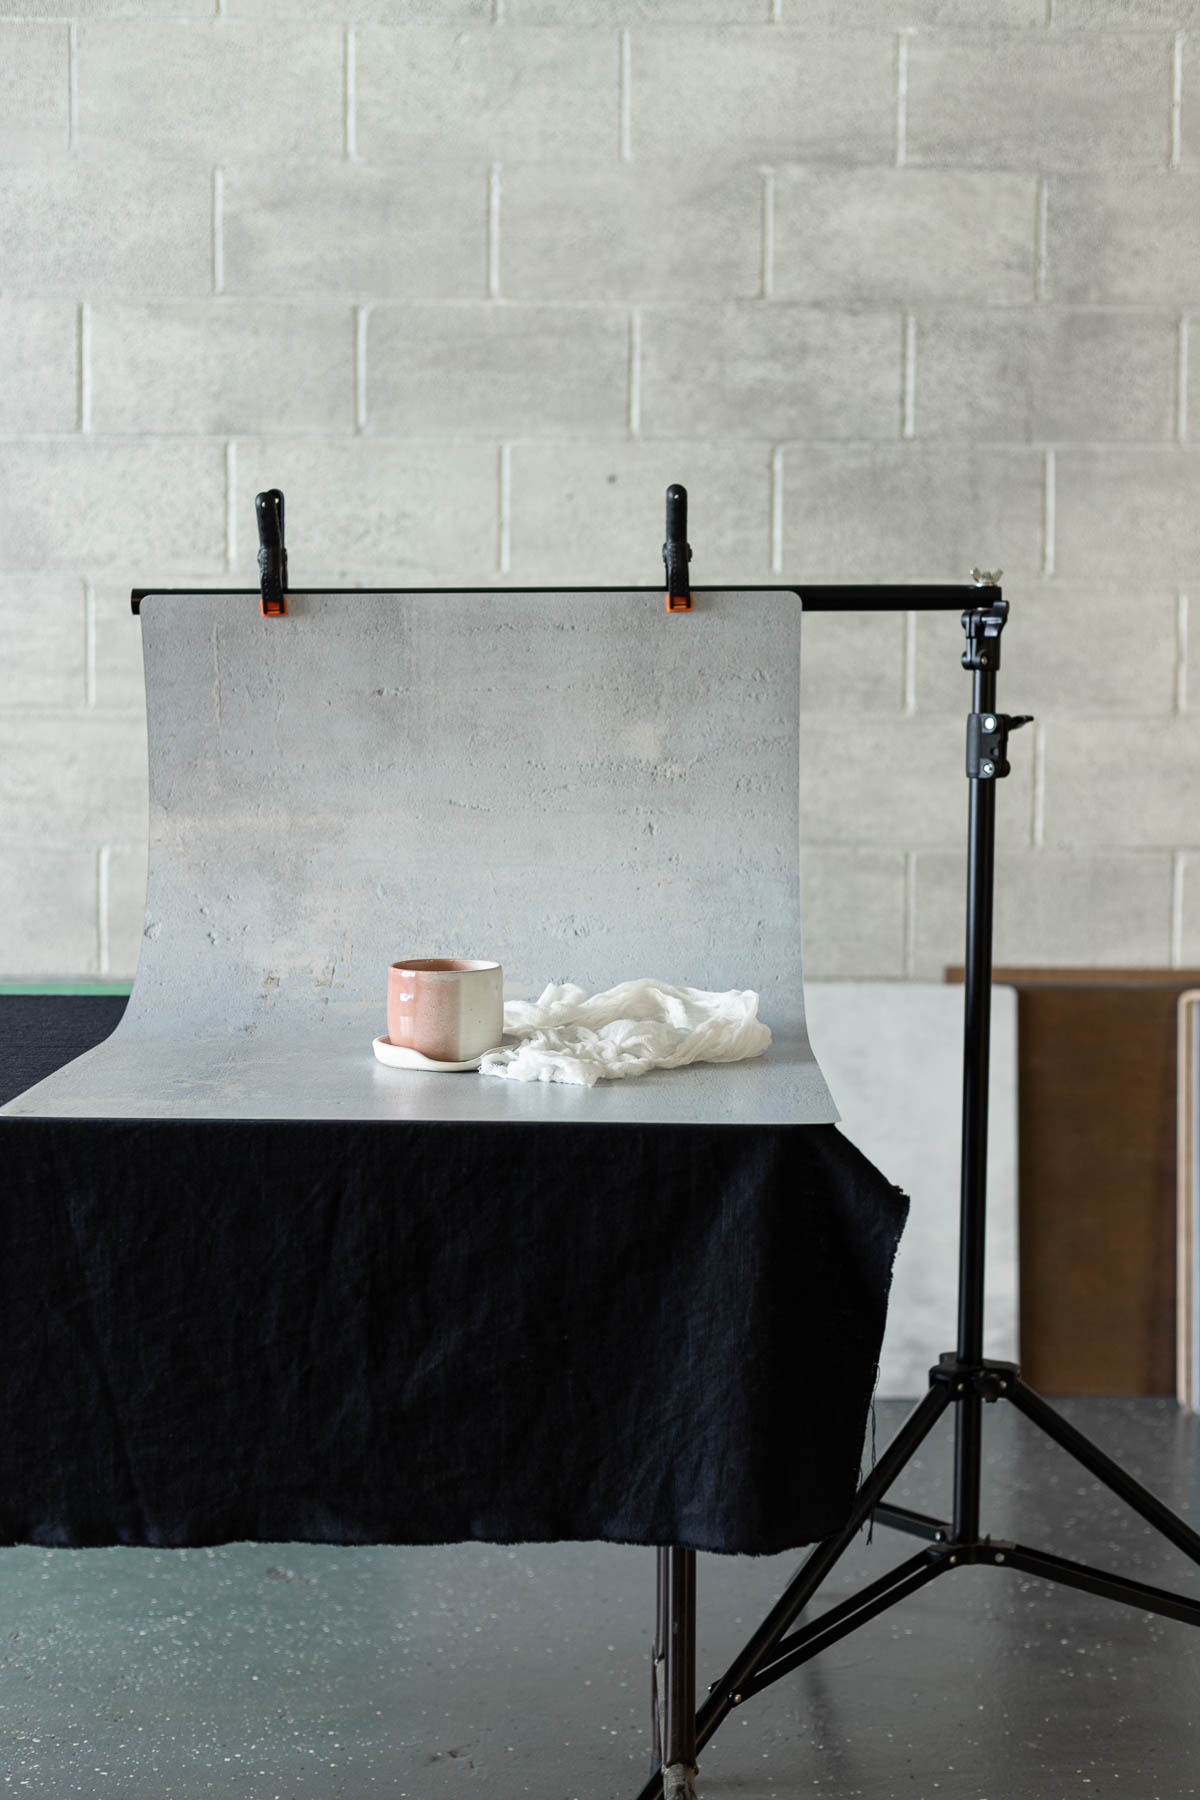
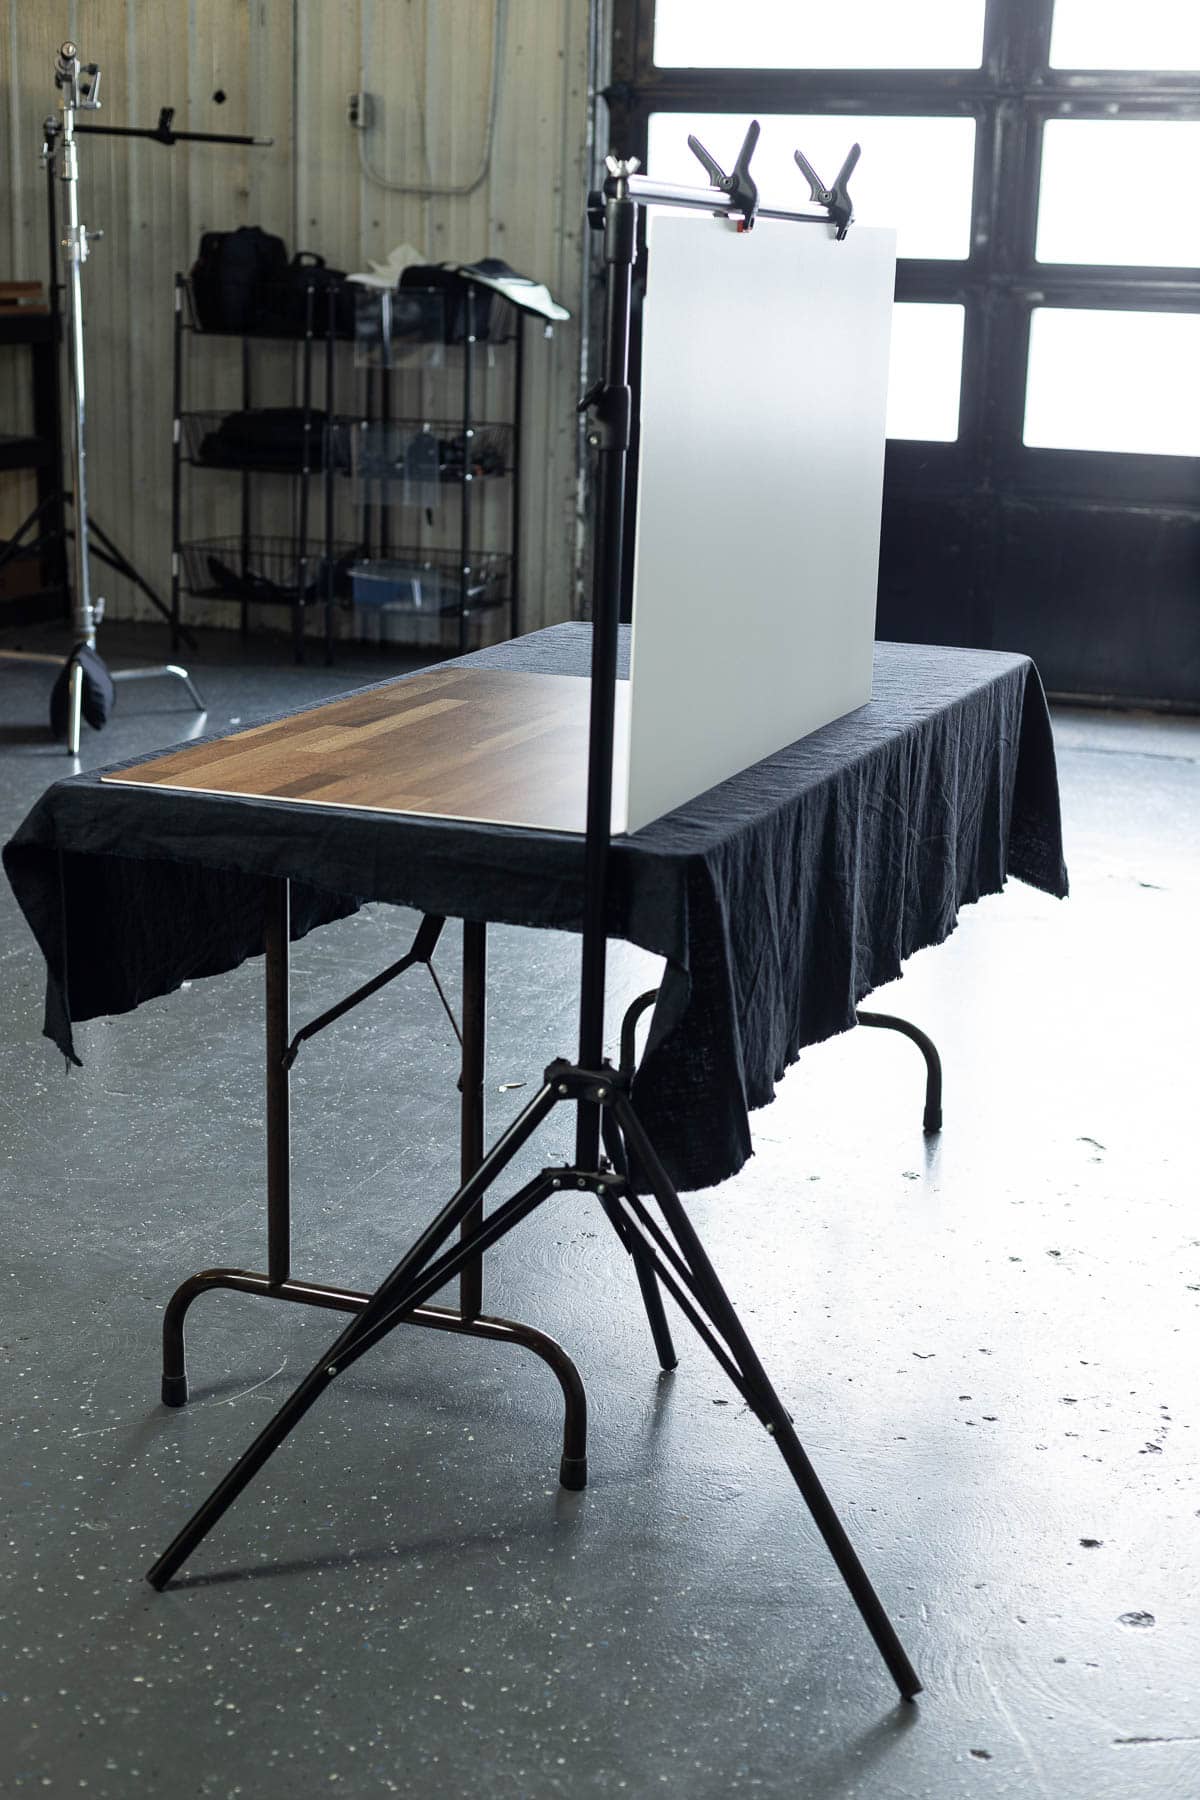
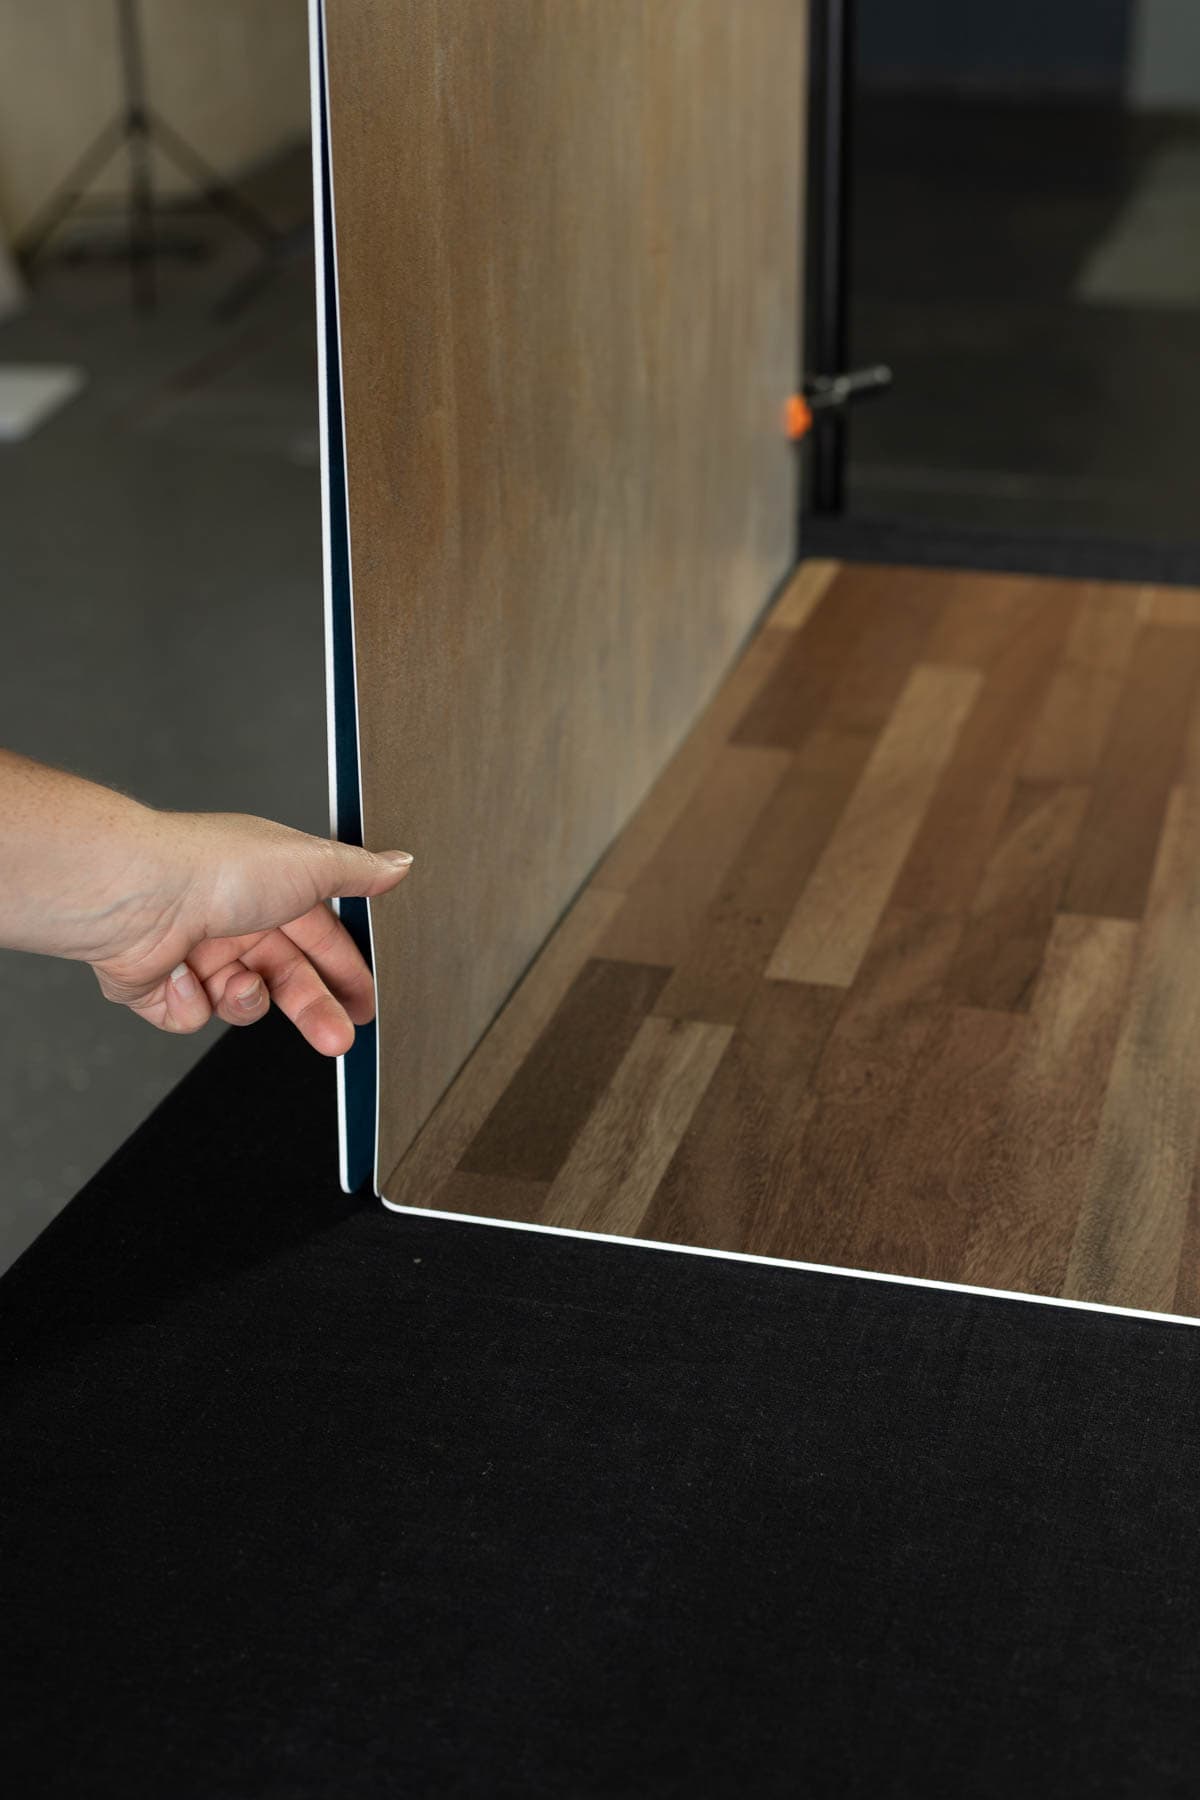
The second option below is if you want to use a separate surface laying flat on your table and have the pliable material standing up in the background as the fake wall behind your scene.
I generally use the backdrops in this orientation since I can create a 90 degree angle wall behind my scene, as well as have a larger surface area that I can shoot on.
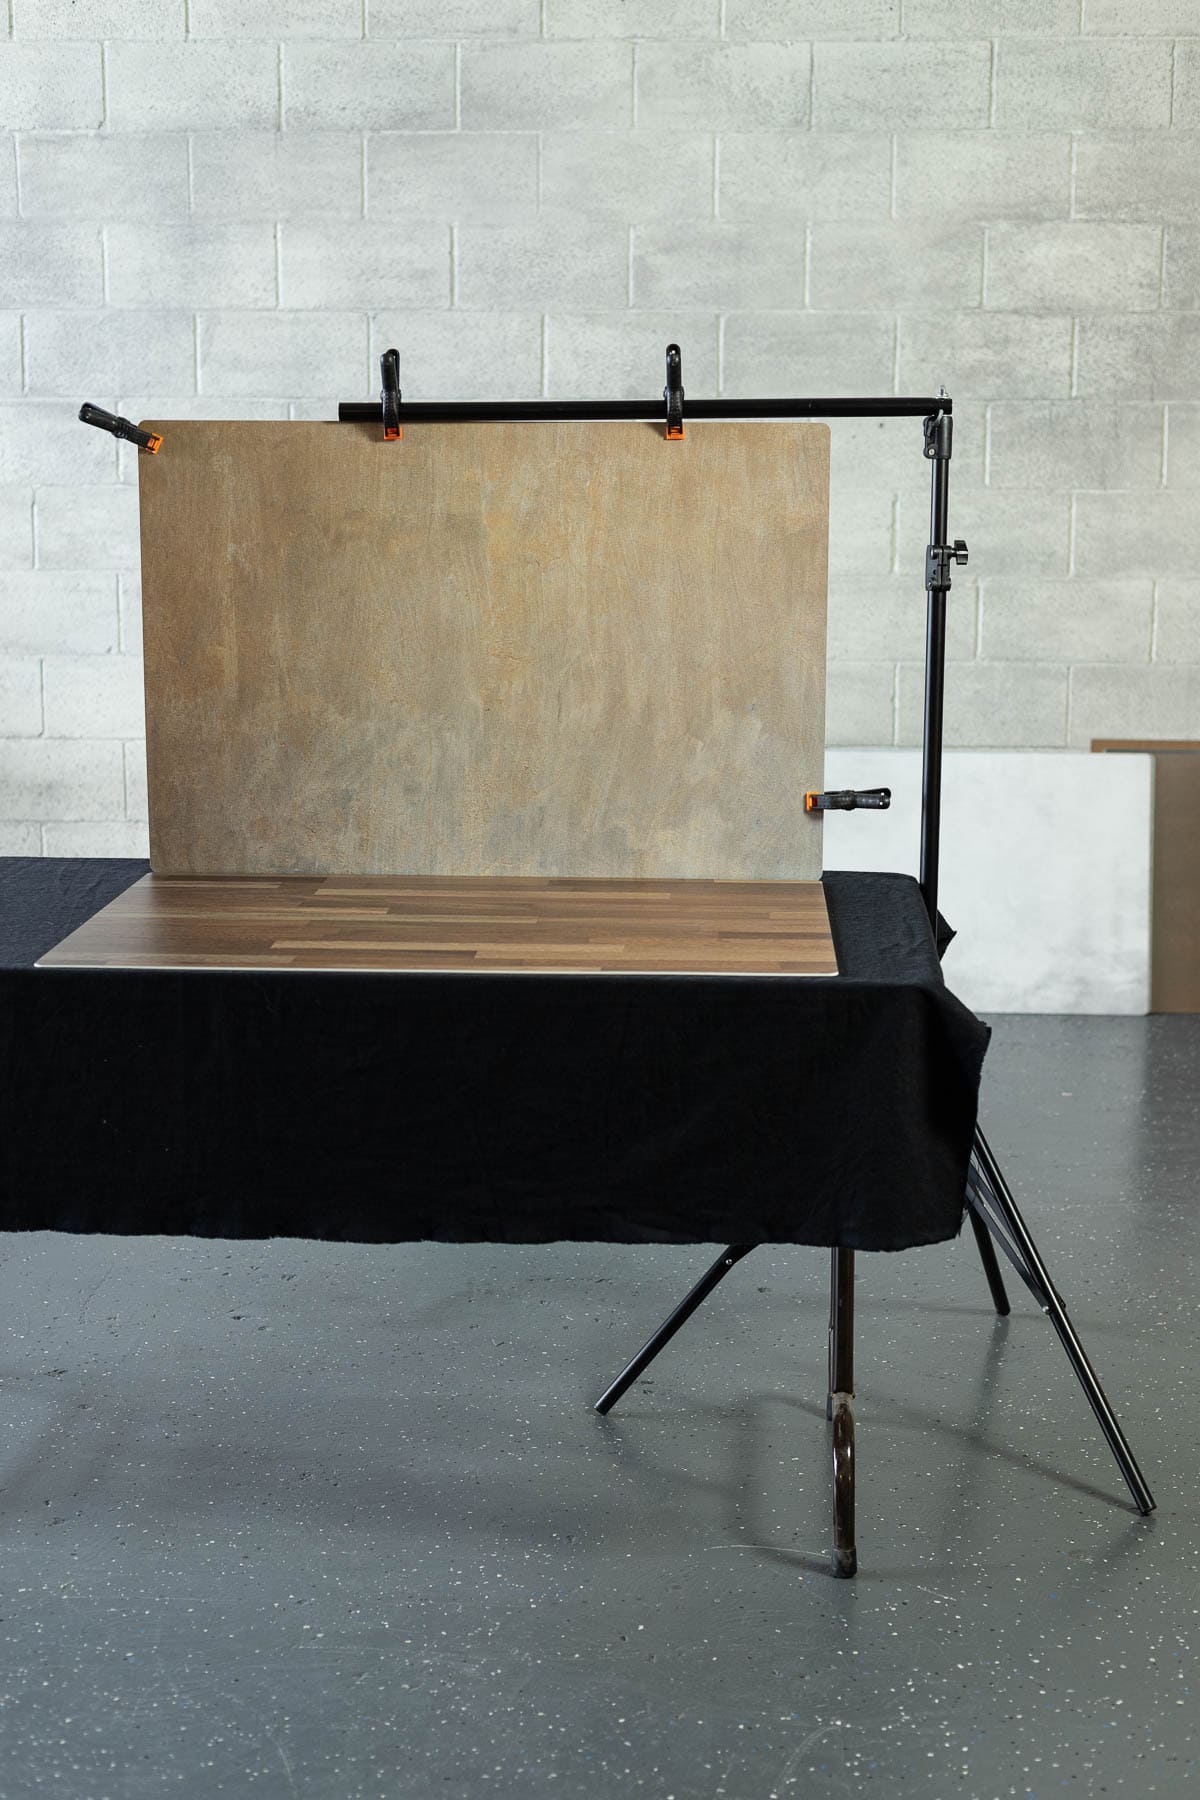
For this option you can use a chair or a photography stand to stand the pliable material up, however you’ll want to use a thicker board to clip the pliable material backdrop to so that it stays flat and symmetrical.
Our 2ft x 3ft lightweight physical backdrops work perfectly for this since they are the same size as our super-thin and pliable backdrops. A lot of our customers will mix and match between the two material styles.
You can also use a large foam board to clip the pliable backdrops to.
If you want to purchase photography clips on their own, these are the clips I have.
How to stand backdrops up vertically
The next option is slightly different if you want to prop up your backdrops vertically. What I find is that if I clip them to the backdrop stand without anything beneath them, they have a tendency to hang in a crooked position.
For this reason, I like to place them on a box or a chair without arms so that they can be propped in a position where they will stay put vertically. I then like to clamp them to a photography stand to hold them at a 90 degree angle. You don’t have to use a photo stand if all you have is a box or a chair with no arms.
How to stand up the small 20-inch x 20-inch backdrops
As a last option, I didn’t want to leave out the 20-inch-x 20-inch backdrops. You can certainly prop them up using the same methods above, but because they are so small you can also just use a heavy kitchen canister to hold them up. I don’t have a photo of that, but it works really easily!
I hope you found these tips helpful for standing up your backdrops so that you can create photos with ease!
If you’d like to try our backdrops please visit our Amazon store page to see all of our styles. Oh and shipping is always free!
Sincerely,
Leslie Osborne
This was incredibly helpful, thanks for all of your information!
Thank you so much, I’m glad it was helpful!